How to Bid the Spot Ticker and Deploy Spot on HyperCore
Here we just help a project to get the ticker on hypercore ,and I found that there is still some part which is not quite clear on existing doc . But thanks for the dedicated core team member of HL @xulian_hl and experienced ticker bidder @NMTD8 to answer lots of my questions .
Out of appreciation and also considering that there is not so many person can get 2k testnet Hype ,I believe that shared my experience would be helpful for anyone who want to get the ticker on hypercore and deploy the spot.
Ticker auction page on mainnet and testnet
Mainnet:
Testnet:
First of all ,there are 6 steps from ticker bidding to hyperliquid deployment on hypercore for spot order book
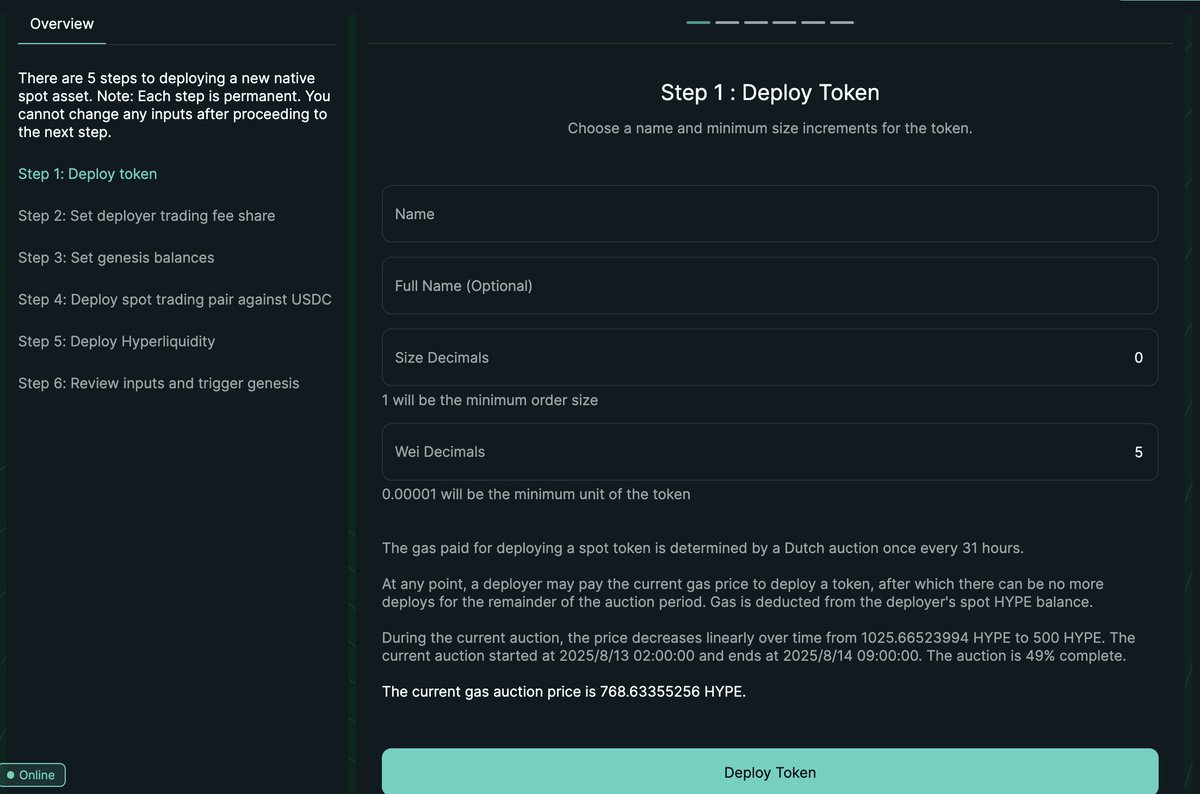
Step1 , Name & Decimals:
1. Name (6 chars max) & Full Name (Optional): it can be any name as long as the ticker has not been taken on hypercore .
2. Size Decimals: The size here is trading size on hypercore order book to control minimum trade increments.
For example, if your “size decimal” setting is 0.1, you cannot place an order for 1.02 tokens—it must adhere to the chosen size granularity.
3 . Wei Decimals: it defines the smallest indivisible unit of your token (like “wei” for ETH). This ensures granular control over how tokens are counted and transferred.
Note according to hyperliquid spot bid side ,the wei decimals should be between 0 ~8
Important note : Once you click the "Deploy Token" then it means that you gonna to pay the $HYPE token as gas for ticker auction . When it shows "Registered token" in the corner of your page ,it means that you are successfully to get the ticker.
Once you get the ticker ,and then you need to set further parameters such as fee sharing ,genesis balance ,trading pair deployment and hyperliquidity .But you can deploy it anytime as long as you complete the step1 and win the gas auction.
Here I recommend you to bid the ticker first and then go to @HyperliquidX's discord to get the ticket for requesting the testnet Hype with your txn of gas auction.And then you can get enough token to test the deployment on testnet .
Step2 , Setting the deployer trading fee share
it is a simple step just to type into the number as percentage of the trading fee you (deployer) would like to share .
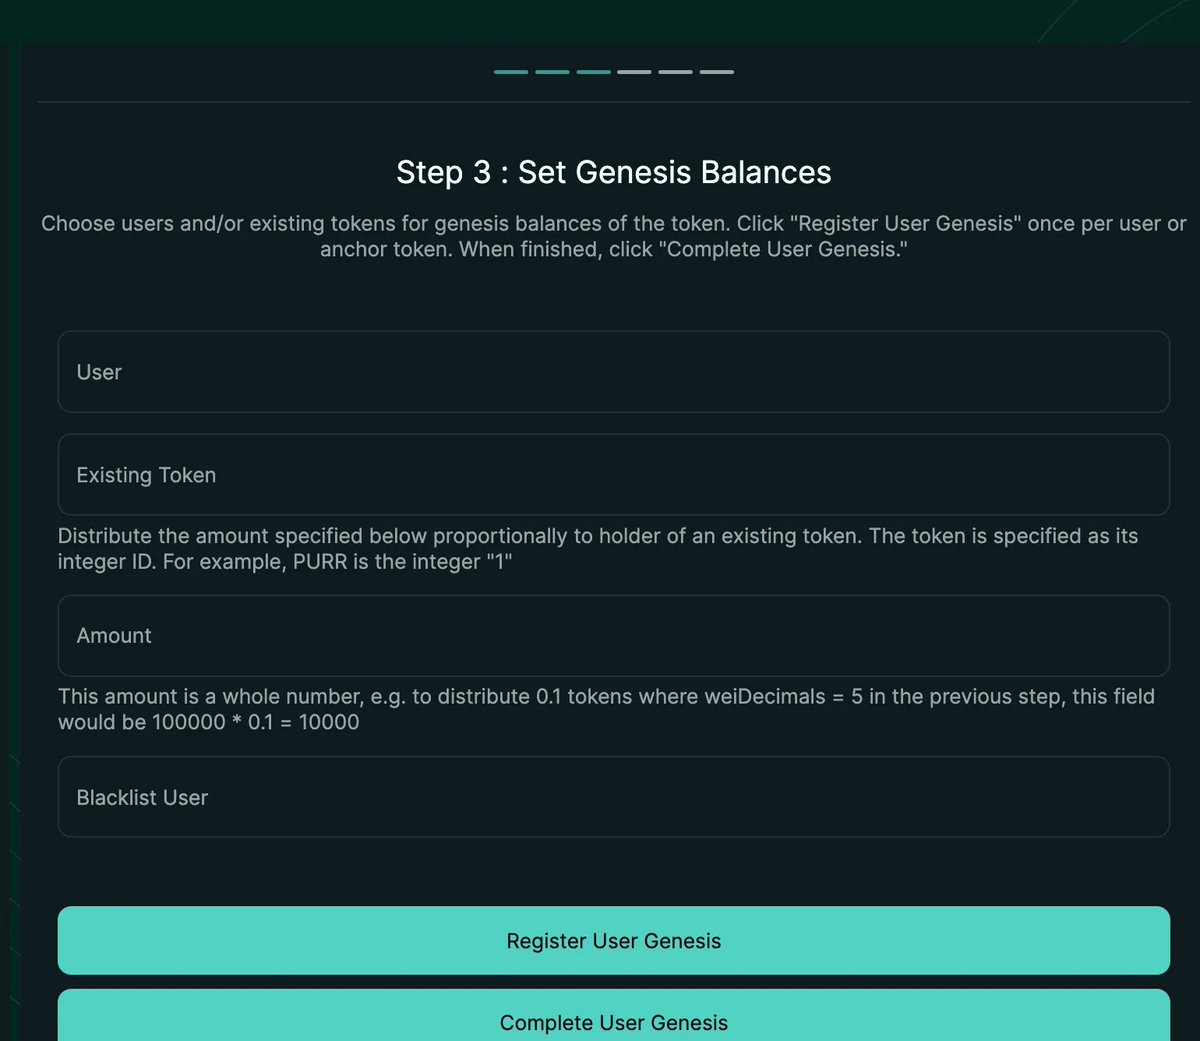
Step3, Get Genesis Balances
To note ,the hip1 token on hypercore is the token with the fixed hard-capped amount which can't not be updated after the genesis balances setting.
So if your token has already been deployed on the other chain , I will recommend to use the largest amt of your token's tts to ensure that all the token on hypercore is enough to do bridge implementation .
usdt0 is a good case study :
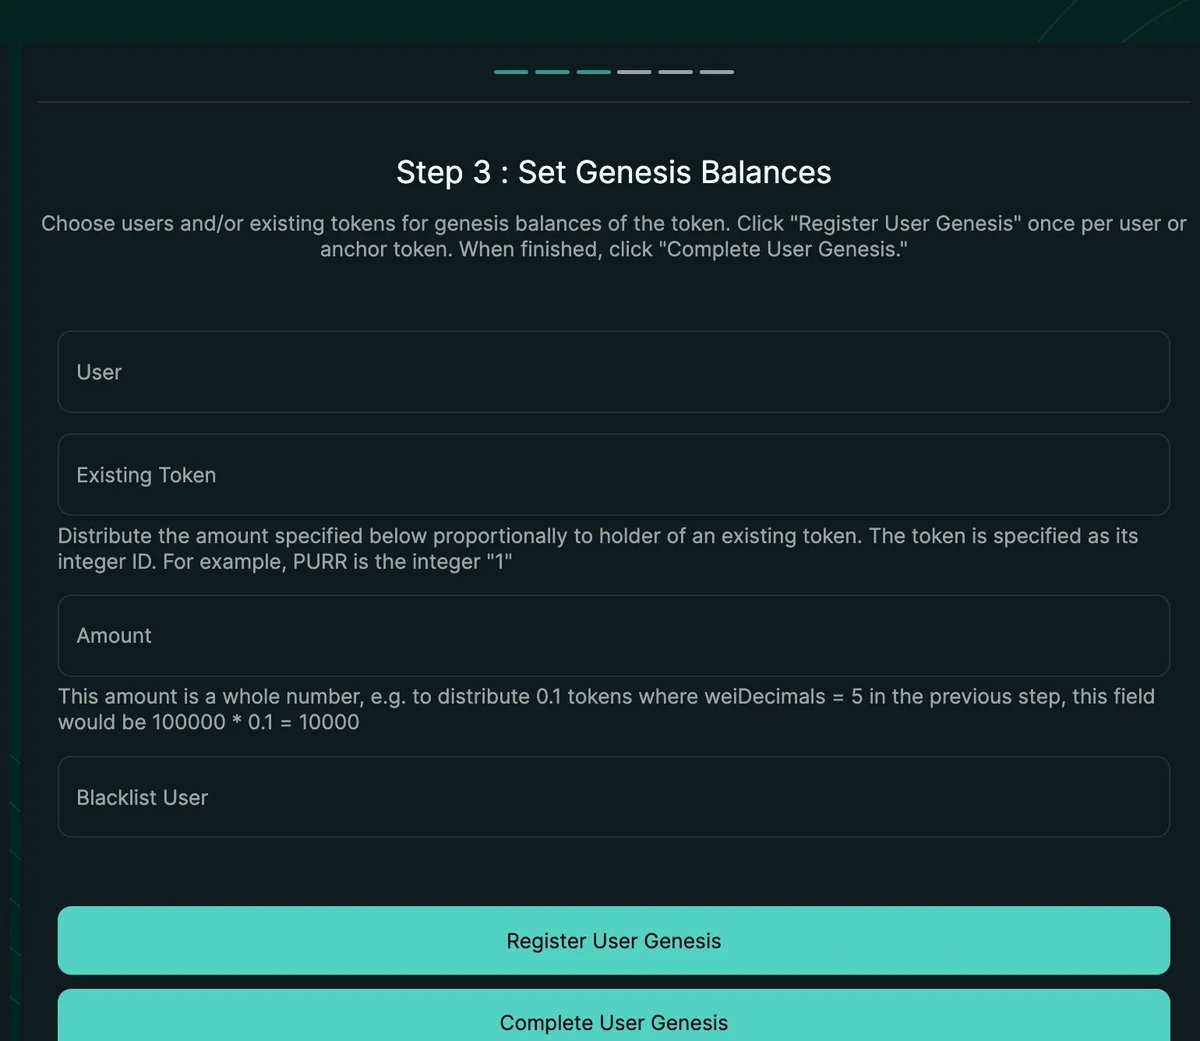
Step3-1 : choose the user or existing token
you can choose to type the user's address or id of existing token on hypercore
- User : input the user’s address
- Existing token : put the id of the existing token on hip1.
Step3-2 : enter the amount the user can get
Step3-3 : Register User Genesis
once you click the rester user genesis it means that you have already completed the setting to distribute the genesis token to that user . And then you can keep adding user genesis for multiple times until you complete all the users/existing token's holder's genesis distribution
If all the distribution is done then we can click the "Complete User Genesis".
Step 4: Deploy spot trading pair against USDC
here they only have a click to let you " deploy spot ",click it and go to the next step .
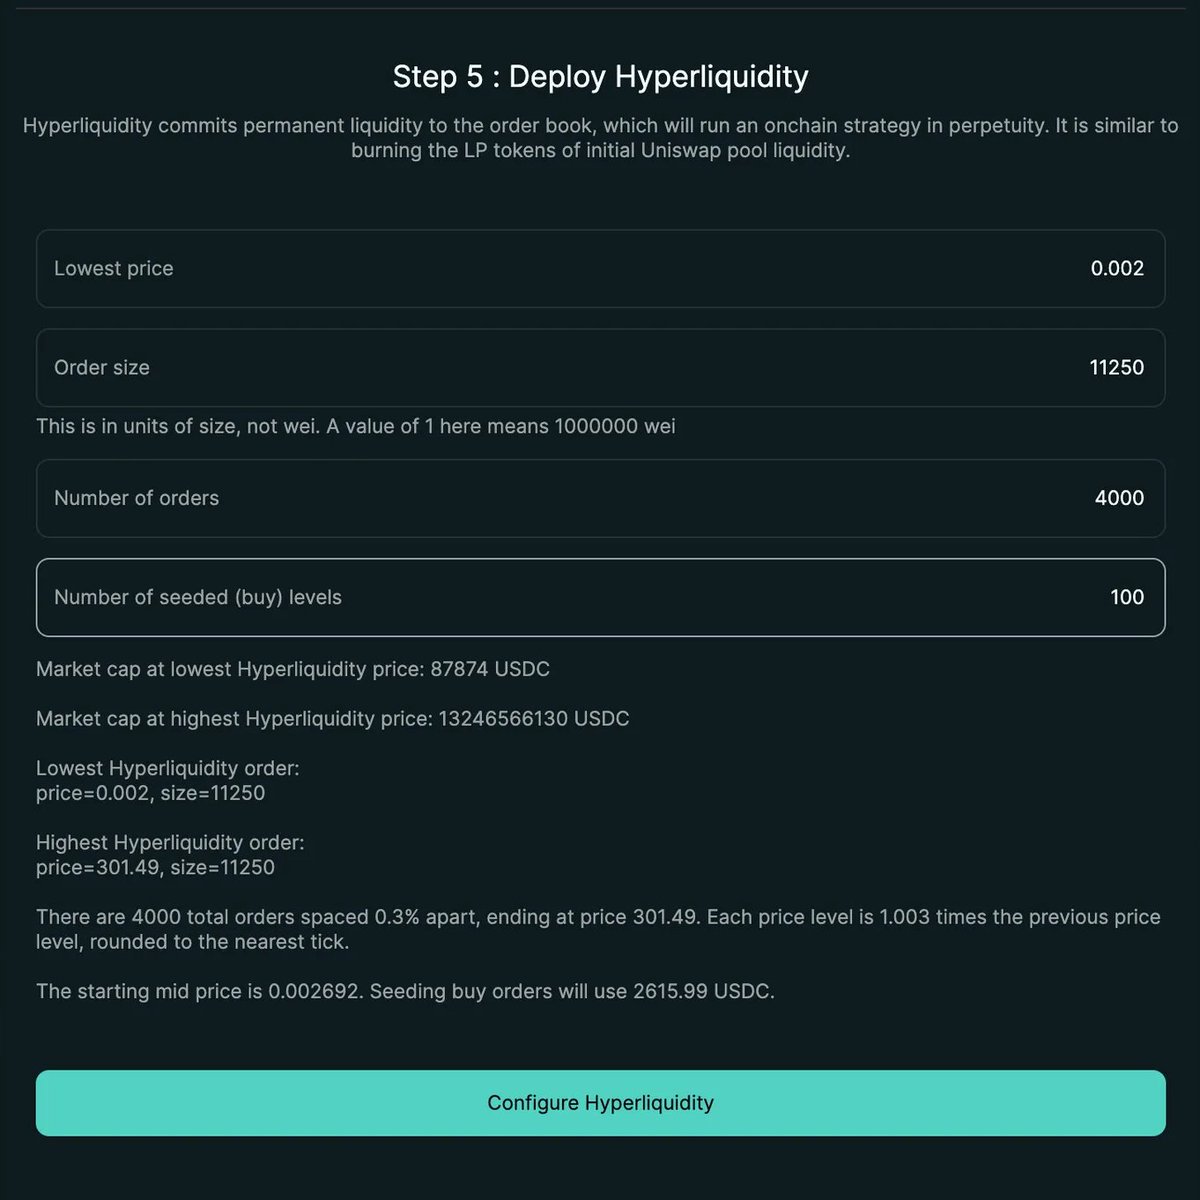
Step 5: Deploy Hyperliquidity
For this step ,the main propose is deploying the hyperliqidity according to HIP2
to note : the liquidity on hypercore order must be more than 1% of tts
Here we have 4 parameters to fill
1. Lowest price
- It is the lowest price on hypercore orderbook you would like to set at the genesis hyperliquidity
2. Order Size
- Order size here is the unit of each trading size. For example if ordersize is 10000 it means that each trading size is 10000 tokens .
3. Number of order
total order from maker and taker initially
4. Number of seeded buy levels
Number of seeded buy levels is for initial maker order book setting (here it also charged the payment of usdc ). For example ,if we set 100 levels there would be ,then there will be 100 order book on buy side .And such USDC is the liquidity which you require to pay here .
Can check my math in the google sheet :
And also recommend to read the well explaining of hyperliquid wiki .
Once you complete the hyperliquidity configure, then the interface would ask you to review inputs and trigger genesis.
When you finish it, you can see a Purr finally and show the "Complete" for your spot deploy !
Final note : As far as I know that both @LayerZero_Core and CCIP powered by @chainlink support the bridge between HyperEVM and HyperCore .
Pls do check and follow the instruction of those crosschain solution . For example ,Layerzero ask to use their sdk for the step2 ~ step 6 instead of hyperliquid spot deploy interface
LZ's doc
Recommended reading :
Finally ,when I am writing my post ,I also found a tutorial from @monprotocol . What an amazing piece !


4.79K
1
The content on this page is provided by third parties. Unless otherwise stated, OKX is not the author of the cited article(s) and does not claim any copyright in the materials. The content is provided for informational purposes only and does not represent the views of OKX. It is not intended to be an endorsement of any kind and should not be considered investment advice or a solicitation to buy or sell digital assets. To the extent generative AI is utilized to provide summaries or other information, such AI generated content may be inaccurate or inconsistent. Please read the linked article for more details and information. OKX is not responsible for content hosted on third party sites. Digital asset holdings, including stablecoins and NFTs, involve a high degree of risk and can fluctuate greatly. You should carefully consider whether trading or holding digital assets is suitable for you in light of your financial condition.

